

Astrophotography is one of the most exciting sides of astronomy. The awe of unlocking the secrets of the deep dark vastness of space is beyond exhilarating, and the ability to capture the view forever takes the experience to a higher plane of delight. Using the best telescope mounts for astrophotography will ensure you make the most of your astral photoshoot session.
Due to the earth’s rotation, you can’t rely on your tripod to take a nice shot of the sky. You might think you snapped a perfect shot of a celestial object only to find out it appears blurry in the photo. Therefore, a good quality mount is an absolute necessity for space photography.
So, in today’s article, I will familiarize you with some brilliant telescope mounts that you can consider for astrophotography. Besides, I will also make you acquainted with the technical know-how that will come in handy while choosing a mount.
Table of Contents
Best Telescope Mounts for Astrophotography
| Mount | Mount type | Payload capacity | Objects in database | Saddle type | Periodic error correction | Mount latitude range | Total unit weight |
|---|---|---|---|---|---|---|---|
| Celestron Advanced VX Computerized Mounts | Computerized GoTo electronic mount | 30lbs | 40,000+ | Dual (Vixen/Losmandy) | Yes | 7-77 degrees | 50lbs |
| Orion AstroView EQ Mount & EQ-3M Motor Drive Kit | Manual equatorial mount | 12lbs | N/A | Vixen | No | 18-63 degrees | 29lbs |
| Orion 9055 Min-EQ Tabletop Equatorial Telescope Mount | Manual equatorial mount | 7lbs | N/A | 1/4″-20 | No | 9-62 degrees | 11.15lbs |
| Sky-Watcher EQ6-R | Computerized GoTo equatorial mount. | 44lbs | 42,900+ | Dual (Vixen/Losmandy) | Yes | N/A | 40lbs |
| Sky-Watcher EQM-35 | Computerized GoTo equatorial mount. | 22lbs | 42,900+ | Vixen | Yes | 15-65 degrees | 40lbs |
1. Celestron Advanced VX Computerized Mount
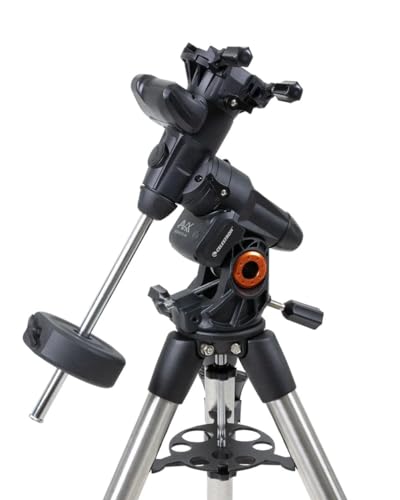
I’m going, being honest here, Celestron Advanced VX Computerized Mounts are frowned upon by many astrophotographers. The contempt mainly comes from the mount’s excessive backlash during autoguiding. The bearingless declination axis in this mount worsens the backlash situation. That said, this mount is still an excellent pick to get started.
The tripod in this mount is steadier than most mounting setups you would find in this price bracket. Paired up with the Celestron NexStar hand controller, Celestron’s much-acclaimed star navigation system, the mount has the potential to deliver some striking photos of the cosmos.
Many would deem 30lbs of payload insufficient, but for a beginner-level astrophotography mount, I would say it’s pretty generous. The mount weighs 50lbs, which gives it the rigidity I was talking about earlier. In addition, the intuitive motor motions make for precise tracking of objects and help avoid load imbalance.
The mount boasts an impressive dual saddle plate compatible with Celestron CG-5 and CGE dovetail bars. This design trait allows you to switch between two types of dovetail bars and enjoy the best of both worlds. In addition, you can use any optical tube of your choice with this mount that falls within its load support range.
Specs
- Mount type: Computerized GoTo electronic mount.
- Load capacity: 30lbs
- Tripod included: Yes
- Objects in database: 40,000+
- Dovetail type: CG5/CGE
- Manual slow-motion controls: No
- Mount slew speeds: 9
- Mount latitude range: 7-77 degrees
- GPS: No
- Wi-fi: No
- Periodic error correction: Yes
- Saddle Type: Dual (Vixen/Losmandy)
- Total unit weight: 50lbs
Features
- Dual saddle plate: Celestron Advanced VX Computerized Mounts pack dual saddle plates that allow the mount to attach to Celestron CG-5 and CGE dovetail bars.
- Dual-axis encoder motors: Celestron Advanced VX Computerized Mount motor drives feature dual axis encoder, generating enough power to neutralize minor load imbalance problems.
- Improved latitude range: Celestron Advanced VX Computerized Mounts have a more extensive latitude range than its preceding models. You can use this mount ranging from 7 to 77 degrees of latitude from any corner of the planet.
Pros
- Enough payload capacity for amateur astrophotographers.
- Programmable periodic error correction system to reduce tracking inaccuracies.
- Comprehensive database with information regarding 40,000+ space objects.
- High torque motors to tackle load imbalances.
Cons
- The GoTo operating software needs frequent recalibration.
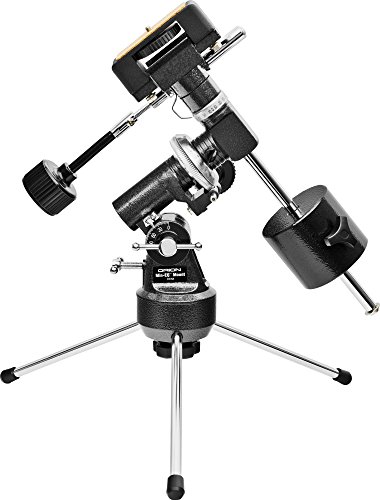
2. Orion AstroView EQ Mount Drive Kit

If you are on a budget and looking to get your first astrophotography mount, you can’t do much better than selecting Orion AstroView EQ Mount Drive Kit. This model is an upgrade to the previously released Orion AstroView mounts and offers more payload capacity than its predecessors. 12lbs might not look much, but it will do for a refractor scope setup.
You can’t expect to ask for a GoTo system for the price you would be paying for this mount. However, this mount has an impressive tracking motor that will ensure your target does not go out of sight. The slow-motion control cables also prove beneficial when tracking an object across the sky.
The mount head of this item features a handy dovetail attachment saddle that enables the mount to easily take on different telescopes without the aid of any other apparatus. You also receive an 8-inch dovetail plate, so no worries if your telescope doesn’t have any. The hinged central support stabilizes the tripod properly.
The EQ-3M motor provides untroubled traction to eliminate the hassle of repeatedly adjusting the mount to keep the target in the scope. You can regulate the tracking speed with the 8x handheld controller. The polar alignment scope makes it a walk in the park to align the scope as it facilitates smooth aligning of the right ascension axis with the Polaris.
Specs
- Mount type: Manual equatorial mount
- Load capacity: 12lbs
- Includes tripod: Yes
- Manual slow-motion controls: Yes
- Mount latitude range: 18-63
- Wi-fi: No
- GPS: No
- Periodic error correction: No
- Saddle Type: Vixen
- Total unit weight: 29lbs
Features
- Mini-motor with smooth tracking ability: Upon connecting the EQ-3M mini-motor on the mount, you can uninterruptedly track any celestial object without your telescope’s viewing range.
- Latest mount head design: The mount head incorporates a modern design to accommodate the swift placement of telescopes without the help of additional tools.
- 8-inch dovetail plate: The mount ships with an 8-inch long dovetail plate, which would be a productive inclusion if your telescope doesn’t come with one.
Pros
- Great budget pick.
- Sufficient load capacity for refractors.
- The mini-motor generates a subtle traction force.
- The handheld controller offers 8 motion control options, including a pause button.
Cons
- Only suitable for entry-level astrophotography.
3. Orion 9055 Min-EQ Tabletop Equatorial Telescope Mount
If you are looking for a compact telescope mount that you can keep in your backpack and take along on your camping trips, Orion 9055 Min-EQ Tabletop Equatorial Telescope Mount is just what you are looking for.
In terms of functionality, there isn’t much to talk about, to be honest. This tiny unit can house no more than 7lbs; yes, you didn’t read that wrong; it is only 7lbs.
Despite its simplicity, it’s possible to do some meaningful astrophotography with this mount. Of course, the main selling point of this item is the price and unmatched portability. Still, it conduces to some fantastic wide-angle astrophotography with its sturdy EQ-1 mount supporting motor drive and robust slow-motion controls.
You would barely notice this mount lying around in your bag when weighing just 10lbs and measuring a meager 14 inches in height. This makes it a perfect choice for overnight adventures, where astrophotography is more of side activity.
Specs
- Mount type: Manual equatorial mount
- Payload capacity: 7lbs
- Includes tripod: No
- Manual slow-motion controls: Yes
- Mount latitude range: 9-72 degrees
- Wi-Fi: No
- GPS: No
- Periodic Error Correction: No
- Saddle Type: 1/4″-20
- Total unit weight: 11.15lbs
Features
- Compact construction: Compact size makes the mount very easy to carry around.
- EQ-1 mount: Comes with a heavy-duty EQ-1 mount on a small tabletop tripod.
- Excellent for wide-angle astrophotography: An impressive carry-around wide-angle astrophotography unit that can defy your expectations with a 35mm camera.
Pros
- Available at a very low price. It doesn’t take a heavy toll on your pocket, even if you decide to buy an additional motorized drive for it.
- Ideal size and weight for portability.
- It has a 4.8lbs counterweight for balancing.
Cons
- The range of telescopes and cameras you can use with this mount is extremely limited.
4. Sky-Watcher EQ6-R Pro
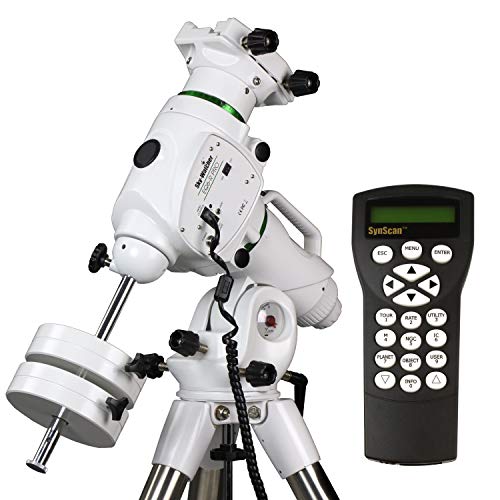
The Sky-Watcher EQ6-R is one of the latest offerings from the Taiwanese telescope manufacturer Sky-Watcher and a direct upgrade to their highly-rated Sky-Watcher NEQ6 mount. After being introduced in 2017, Sky-Watcher EQ6-R Pro quickly became a favorite among the astrophotography community.
Aligning the Sky-Watcher EQ6-R Pro is no big deal, and it only gets easier after you align it for the first time, thanks to the mount’s ‘park’ feature. This particular attribute lets the scope return to its aligning position every time once you align it manually for the first time. Don’t forget to go through the instruction manual to understand how to use the park feature.
I would also like to highlight the belt drives used in the mount that dramatically cut down backlash. Backlash is a common problem that haunts all telescope mounts, more or less. The gears that bridge the gap between the motor and the worm drive are the primary culprits for backlash. This mount uses a belted mechanism instead of gears, which eliminates backlash.
Throughout this article, I have stressed the importance of getting an excellent equatorial mount for your astrophotography pursuits. With many premium features, Sky-Watcher EQ6-R Pro is one of the best mounts you can buy to meet your astrophotography demands.
Specs
- Mount type: Computerized GoTo equatorial mount
- Payload capacity: 44lbs
- Includes tripod: Yes
- Objects in database: 42,900+
- Manual slow-motion controls: No
- Wi-Fi: No
- GPS: No
- Periodic error correction: Yes
- Saddle Type: Dual (Vixen/Losmandy)
- Total unit weight: 40lbs
Features
- Belt-driven motor: The mount replaces motor gears with belt drives to terminate periodic error or backlash.
- Remote-controlled DSLR operation: The SNAP port allows you to control your DSLR camera remotely.
- Integrated polar finderscope: Using the built-in polar finder scope, you can polar align your telescope in minutes.
Pros
- Phenomenal tracking performance on auto guide mode.
- The motor barely produces any sound even when it slews at 9x speed.
- It can realign automatically once you align the telescope manually for the first time.
- Manual alignment is also easy.
- Periodic error is near zero.
Cons
- Expensive.
5. Sky-Watcher EQM-35
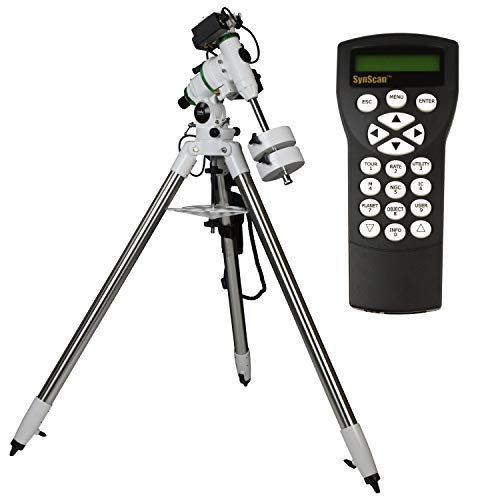
Sky-Watcher EQM-35 is one of my personal favorites when it comes to mid-priced telescope mounts for astrophotography. While this mount does have its constraints, I like it for striking the right balance between cost-effectiveness, lightweight portability, and ruggedness.
If you are familiar with Sky-Watcher EQ-3, you could easily mistake Sky-Watcher EQM-35 for an EQ-3. The mounts are similarly designed, but the EQM-35 has upgraded capabilities in almost all aspects.
It’s possible to convert the mount to a lighter version. You can do this by taking off the declination axis from the mount. Doing so, you would be getting rid of as much as 1kg of weight, but in terms of functionality, you wouldn’t be making much of a sacrifice.
Sky-Watcher EQM-35 also significantly improved in tracking capacity compared to EQ-3, as a 180-tooth gear wheel powers the rotation of its right ascension axis. To put this in context, the EQ-3 gear wheel has only 130 teeth.
Specs
- Mount type: Computerized GoTo equatorial mount.
- Load capacity: 22lbs
- Tripod included: Yes
- Objects in database: 42,900+
- Manual slow-motion controls: No
- Mount slew speeds: 10
- Mount latitude range: 15-65 degrees
- Wi-Fi: No
- GPS: No
- Periodic error correction: Yes
- Saddle Type: Vixen
- Total unit weight: 40lbs
Features
- Two-size design: Can be used either as a full-size equatorial mount or can be transformed into a lighter tracking unit using a dec bracket.
- 180-tooth gear wheel: The RA axis of the mount effortlessly rotates with the help of a functional 180-tooth gear wheel.
- Complete metal construction: Full metal builds for more excellent stability and durability.
Pros
- The declination axis can be removed to transform into a tracking mount.
- Sturdy build.
- It can hold refractor telescopes with a maximum aperture of 100mm.
Cons
- The 22lbs payload capacity is insufficient to fit larger telescopes and cameras.
Which Type of Mount Is The Best For Astrophotography?

The first question you would be facing when you go shopping for a telescope mount is-what kind of one you are looking for? You would need to choose between an alt-azimuth mount and an equatorial mount. Since you want to use a mount for astrophotography, what would be the ideal pick for you?
Alt-azimuth is the simplest of the two options you have here. These mounts have a two-dimensional range of motion. You can move them horizontally using the azimuth axis, while the altitude axis allows for vertical movement. However, these mounts must be manually readjusted as the stars change positions due to the earth’s rotation.
Computerized alt-azimuth mounts can remedy this problem as they are programmed to track the movement of their celestial targets. Of course, the target will always remain in the center of your eyepiece, but shifting the entire field of view would be problematic in capturing long-exposure shots.
Hence, most astrophotography experts prefer using equatorial mounts instead of alt-azimuth mounts. These mounts come equipped with motorized drives that enable them to account for the earth’s rotation and automatically readjust their positions to find the perfect view of the mobile target object.
How’s this any different from computerized alt-azimuth mounts? Automated alt-az mounts use both axes in unison to re-orient themselves in line with the target’s trajectory. By doing so, they can track the object accurately and turn round the field of view, which would result in a blur if you try to take a picture.
On the other hand, the equatorial mounts only rely on the polar axis to keep track of the object. As a result, the other axis remains motionless, providing you with a stable field of view, which is just the thing you need for astrophotography.
Equatorial Telescope Mounts

Now you know that equatorial telescope mounts are your best bet when trying to take a picture of the night sky. An equatorial mount, often known as an EQ mount, can make up for the earth’s rotation while following an object. If the mount’s polar axis is correctly aligned with our planet’s polar axis, the mount can tread on the heels of any celestial body with utmost precision.
Equatorial mounts have two orbiting axes- a horizontal equatorial/polar/right ascension axis and a vertical declination axis—the horizontal take on the task of repositioning itself according to the earth’s rotational movements. At the same time, the declination axis accommodates positioning the telescope at suitable declinations for viewing different targets.
The equatorial mount comes in two variations-
- German Equatorial Mounts- These mounts are shaped like the alphabet ‘T.’ The longer part of the T aligns with the earth’s north or south pole, depending on which hemisphere of the globe you are in.
- Fork Mounts: These mounts are shaped like a two-tined fork placed on a wedge. The bottom of the fork serves as the mount’s right ascension axis, and the prongs form the declination axis.
The German Equatorial Mount

The German Equatorial Mount incorporates a T-like design, with the declination axis rooting from the right ascension axis below. The declination axis holds the telescope, with a counterweight used in the opposite direction to balance the setup.
German Equatorial Mounts were a common sight in intermediate to premium grade telescopes before the arrival of computerized mounts. However, even today, these mounts are pretty relevant and widely used in mid-range scopes. In addition, their construction is hugely advantageous for astrophotography.
For long exposure photography, the object’s view must be secured within the scope for a substantial time. However, as GEMs can automatically adjust themselves to earth’s rotation once accurately calibrated, they can allow you to take some crisp images of the great space through time-exposure photography.
How does the GEM trump fork mounts in this regard? Since both are equatorial mounts, shouldn’t astrophotographers get similar benefits from both of them?
The answer is no. Using a GEM gives you exclusive access to certain perks. For instance, the axis-telescope distance in a GEM is significantly shorter than in fork mounts. This makes the GEM more balanced and immune to vibration.
The GEM disassemblies into smaller parts compared to fork mounts. So, they are much easier to carry around even though they are heavier than fork mounts once fully assembled. The heavyweight feature is intentionally done to make the mount more stable.
Fork mounts are extremely limited in terms of versatility. Unlike their GEM counterparts, they are not compatible with a wide range of gears. Therefore, a GEM is a cost-effective choice since you can use it with multiple telescopes.
Computerized GoTo Telescope Mounts

Computerized GoTo telescope mounts come with a digital database that contains the coordinates of thousands of space entities. This is a groundbreaking addition to the world of astronomy, as it eliminates the need to spend hours trying to locate a particular star in the sky.
The mount can be controlled directly by a handheld remote control or through a controller software installed on your computer or mobile device. The screen of the controller or your smart device will show you information on various space objects. For example, you can input the name of the object you want to view and let the mount detect it in the sky.
These mounts made astrophotography much easier with accurate positioning and perfect stability. They can also trace the target object as you place your camera on the mount. Using a proficient GoTo mount with a smartphone adapter can help you take some good shots of space objects with your smartphone.
To prepare your GoTo mount for action, you must input a string of information. The mount needs to know your exact location, time, date, and which direction is north. Some models have built-in navigational systems that can auto-detect this information. If your mount doesn’t have a GPS and a compass, then you would need to type in these data manually.
Then you would need to align your telescope to the sky. The standard way to do this is to level the tripod and focus on some bright stars to bring them centrally within your field of view. It would be best to pick a spot with level ground and an open sky to do this. Of course, top-of-the-line mounts like Celestron StarSense can do the alignment themselves.
After you complete the alignment, your telescope is up for stargazing. Just ensure the scope doesn’t go out of alignment by someone accidentally bumping into it. To save your scope from wandering feet, you can attach colorful LEDs to the tripod stands so that people can notice your instrument in the dark.
Alt-Azimuth Mounts

At this point, you must be thinking, “Okay, why are we talking about Alt-Azimuth mounts again? We already know that they are not good for taking astrophotos. So, why bother discussing them?” While I would still advise you to go for an EQ mount, I feel this article would be left incomplete if I didn’t talk about alt-azimuth mounts in a bit more detail.
Alt-azimuth mounts have been around since the earliest day of telescopes. There are two axes for rotation-one moves horizontally, and the other moves up and down. The term ‘alt’ is a shortened form for altitude, and ‘azimuth’ refers to the direction of a particular space object in respect of the observer.
The reason behind writing off alt-az mounts for astrophotography was the occurrence of field rotation in these mounts. However, because of tremendous advancements in astronomy, it is now possible to prevent field rotation in state-of-the-art alt-azimuth mounts.
You can address the field rotation issue with a simple accessory. First, buy a camera rotator for your alt-az mount that will sit atop the camera and allow the camera to rotate freely along its optical axis.
A camera rotator ensures a firm and steady field of view when tracking an object using an alt-azimuth mount. This makes the mount suitable for prolonged exposure space photography and allows you to control the camera motions remotely. You would also find camera rotators very helpful in finding guide stars in a narrow field of view.
Dobsonian Mounts

Dobsonian mounts are modified alt-azimuth mounts with design tweaks that were quite effective in terminating some of the drawbacks of the classic alt-az mount. In addition, Dobsonian mounts are pretty budget-friendly and can be a good choice for entry-level astrophotography.
Don’t expect to photograph something incredibly distant like the Messier objects with a Dobsonian mount, though. These are built for simple Newtonian refractors, mainly used for observation. But you can improvise and use the mount for some good planetary photoshoots.
You can use the drift method to take multiple photos of a planet and create a detailed final output. Then, take a few short videos as the planet drifts across the field and stack them upon each other to generate a more accurate image. You can also use a Barlow to blow up the details, but the challenge is to find a perfect focal ratio that gives you the best results.
One of the upgrades of a Dobsonian mount over traditional alt-azimuth mounts is its equatorial platform compatibility. An equatorial platform is a table you can place under a Dobsonian mount to revolve the mount at a rate that matches the rotation speed of a target object. However, this can only be done over a limited period (one hour usually).
Manual vs. Motorized Tracking
The most significant advantage manual tracking systems have over motorized ones is their conveniently low price. Manual mounts are as straightforward as they come, so they are unsurprisingly cheaper than motorized ones. Motorized tracking systems would set you back significantly since you are investing in additional machinery.
The perk of motorized tracking lies in its ease of use and effectiveness. You don’t need to readjust the positioning to keep track of the object. In addition, the drive will make sure you stay in pursuit without having to take your eye off the eyepiece. This is not the case when you are using a manual mount.
Manual tracking could be an intelligent choice for observational purposes as it would let you invest heavily in the telescope. For astrophotography, however, time is of the essence. So you wouldn’t want to waste your time adjusting the mount, risking the chance of missing out on a perfect shot.
I would say a motorized mount is an absolute necessity if you take your astrophotography seriously.
Equatorial Mount vs. Alt-Az Mount
| Equatorial Mount | Alt-Azimuth Mount |
|---|---|
| A bit difficult to set up as it needs to be polar aligned, attached with counterweights, etc. | The setup procedure for Alt-Azimuth mounts is much simpler—no need to use counterweights, level tripods, or align them with the earth’s polar axis. |
| Heavier as it comes with additional machinery. | Lighter than equatorial mounts as these mounts don’t have motor drives or other accessories. |
| The rotating rings on an equatorial mount might restrict you from pointing the telescope in specific directions. | Many astronomy enthusiasts find it easier to hop from one target to another as you can move the scope in the direction you want. |
| It is ideal for astrophotography as it can follow celestial objects in diurnal motion. | Alt-azimuth mounts are susceptible to field-of-view rotation, which generates blurry images of the sky in long exposure shots. |
| More expensive than alt-az mounts because of its extra components. | Cheaper because of its more straightforward design. |
| Easier to change eyepieces during observing a moving object as the telescope keeps rotating. | Difficult to change eyepieces while observing a moving object as it imbalances the mount’s positioning. |
| Not suitable for terrestrial photography. | Suitable for terrestrial photography. |
How to Choose a Mount for Astrophotography
How Important is a Mount?
Even though mounts are often overlooked, their role in getting satisfactory output from your telescope will get conspicuous to you as you get more and more experienced in the world of astronomy. In astrophotography, I would say that the mount ranks higher in the priority list than the telescope itself!
Prioritize EQ Mounts
Suppose you have been reading the article from the very beginning. In that case, you know by now that I’m not a great fan of using alt-azimuth mounts for astrophotography, and there are plenty of reasons why you shouldn’t consider them for your astrophotography setup. Therefore, you should be looking to buy an equatorial mount that features a motor drive to revolve the scope.
Don’t be Allured by Low-Quality Mounts.
Not all equatorial mounts are going to cut, though. Some inexpensive, flimsy mounts out there would seem appealing to you because of their low price. By all means, there are some excellent budget options up for grabs. But even so, you need to ensure the mount you buy fulfills specific criteria- otherwise, you would be throwing your money away.
Are You Sure What You Need?
First of all, you need to be sure about your level of passion for astrophotography. Is this a fling, or are you in it for the long haul? If the latter is the case, you should be prepared to loosen your purse strings and get a decent starter mount. On the other hand, if you are ardent about taking photos of the night sky, the limitations of an entry-level will frustrate you quickly.
Are GoTos a must-have?
GoTo mounts will do away with all the boring stuff you had to do to get your system up and running. All you need to do is insert the name of the desired object, and the mount will find it for you. This is a great trait, but it doesn’t come cheap. Besides, you might like doing things a bit old-fashioned way. So, getting a GoTo is nice, but it’s far from essential.
Check for Sturdiness
You need a strong mount that will give your telescope the desired stability. For example, you can’t afford the telescope to budge in the wind while trying to take a photo of something drifting across space. Look for a heavy and well-built mount to serve this purpose.
Heavy Mounts are Sturdier
A heavy mount will be a bit troublesome to carry, but it will give you the resilience you need against the wind in an open area. Besides, you can take apart equatorial mounts into many smaller pieces. So, if you are out with a group, you can share the weight with others.
Speaking of weight, a characteristic you must look out for a while buying a telescope mount is the payload capacity. This refers to the maximum weight your mount can hold and support.
Be Sure You Know the Exact Payload Capacity
Some models only indicate the telescope’s weight when they state the payload capacity, while some models include both counterweights and the actual weight of the telescope. Consult the manufacturer to know how much weight your mount can put up with.
If a mount advertises it has a payload capacity of 50lbs, it could either mean it can hold a total of 50lbs, or it could hold a telescope 50lbs of the camera and telescope weight and 50lbs on top of that for the counterweight. So you need to know the specifics, or you might break your mount.
Don’t Exhaust the Mount’s Load Capacity.
Also, it’s recommended that you don’t put on more than 60% of the maximum payload. If you follow this rule, you can expect better results from your mount, especially during time-exposure shots.
The more you approach the maximum load capacity, the more you will suffer from tracking errors. The setup will become more susceptible to getting imbalanced and deteriorate image quality even further.
What do You Need for Slow-Shutter/Long-Exposure Astrophotography?
For some slow severe shutter astrophotography, go for a GEM that features motor drives in both axes. You would also want it to have alt-az adjustments to accurately align the instrument with the earth’s polar axis. Fork mounts are also capable of undertaking such a challenge, but I prefer the simplicity of a GEM.
The Advantages of Equatorial Mounts for Astrophotography
You can point your scope at some awkward angles with an Alt-Azimuth mount. While that’s a great ability, this particular attribute does come with a price. You need to move your scope along both axes, which results in a rotation of the field of view. As I’ve said, that’s a no-no when it comes to astrophotography.
Equatorial mounts solve this problem by aligning the scope with the earth’s polar axis. If you are observing from the Northern hemisphere, you can do this by bringing Polaris into your polar scope. Unfortunately, the alignment is tricky on the other part of the globe, where you need to refer to a dim star neighboring the Octans.
By polar aligning the telescope, equatorial mounts ensure the telescope follows any space object at diurnal motion. Therefore, you can keep any celestial body in your scope without changing the declination. This results in a stable field of view throughout your observation period, making equatorial mounts a better pick for astroimaging.
Final Thoughts
Astrophotography complications would have been significantly less if the earth stayed still. Instead, you need to use an equatorial mount that can compensate for the earth’s rotation and help you take pictures of distant space objects with desired quality.
In this article, I’ve only reviewed equatorial mounts because they are always the first choices for astrophotography. Of course, you can get some good photos of the cosmos using alt-azimuth mounts, but it’s nowhere near as simple as using equatorials.
The models featured in my best telescope mounts for astrophotography article come with different price tags and, of course, different utilities. Nevertheless, buying any of the telescope mounts mentioned above could be a worthy expenditure if you are sure about your astrophotography ambitions.
Last update on 2024-04-05 / Affiliate links / Images from Amazon Product Advertising API
This post contains affiliate links, which means I may receive a small commission, at no extra cost to you, if you make a purchase using these links.