

There is a terrifying notion about garbage disposals brought by horror films that show mutilated body parts disposed of in them.
However, this is slightly far-fetched in real life. The blades of garbage disposals are quite dull grinders and aren’t the shimmering blades that can cut through steel that most of you expect.
But it does not mean that you should be carefree around these things. The grinders of garbage disposals can still hurt you if you aren’t careful.
The golden rule is to never stick your hands or fingers inside the garbage disposal regardless if it is already unplugged or the circuit has already been switched off. In the unfortunate event that it suddenly gets switched on while your hands are in there, you could get seriously injured.
Just don’t reach into it. It’s as simple as that. As long as you follow it, then you won’t have to worry about hurting yourself, and you can make repairs for minor problems.
Table of Contents
The origin story of the garbage disposal
The story of how the garbage disposal came to be is quite interesting. The competition for the first inventor of the garbage disposal unit is between Architect John W. Hammes and General Electric.
The former claims that he invented the very first garbage disposal unit in 1927 and applied for a patent claim in 1933. The application was approved in 1935, and the units were marketed five years later.
General Electric also publicized its version of a garbage disposal unit in 1935, which became the reason for the debate about who came up with it first. But one thing remains clear – Hammes significantly impacts the garbage disposal unit, an important part of the common household. His company, the InSinkErator, remains a tough contender in the business today.
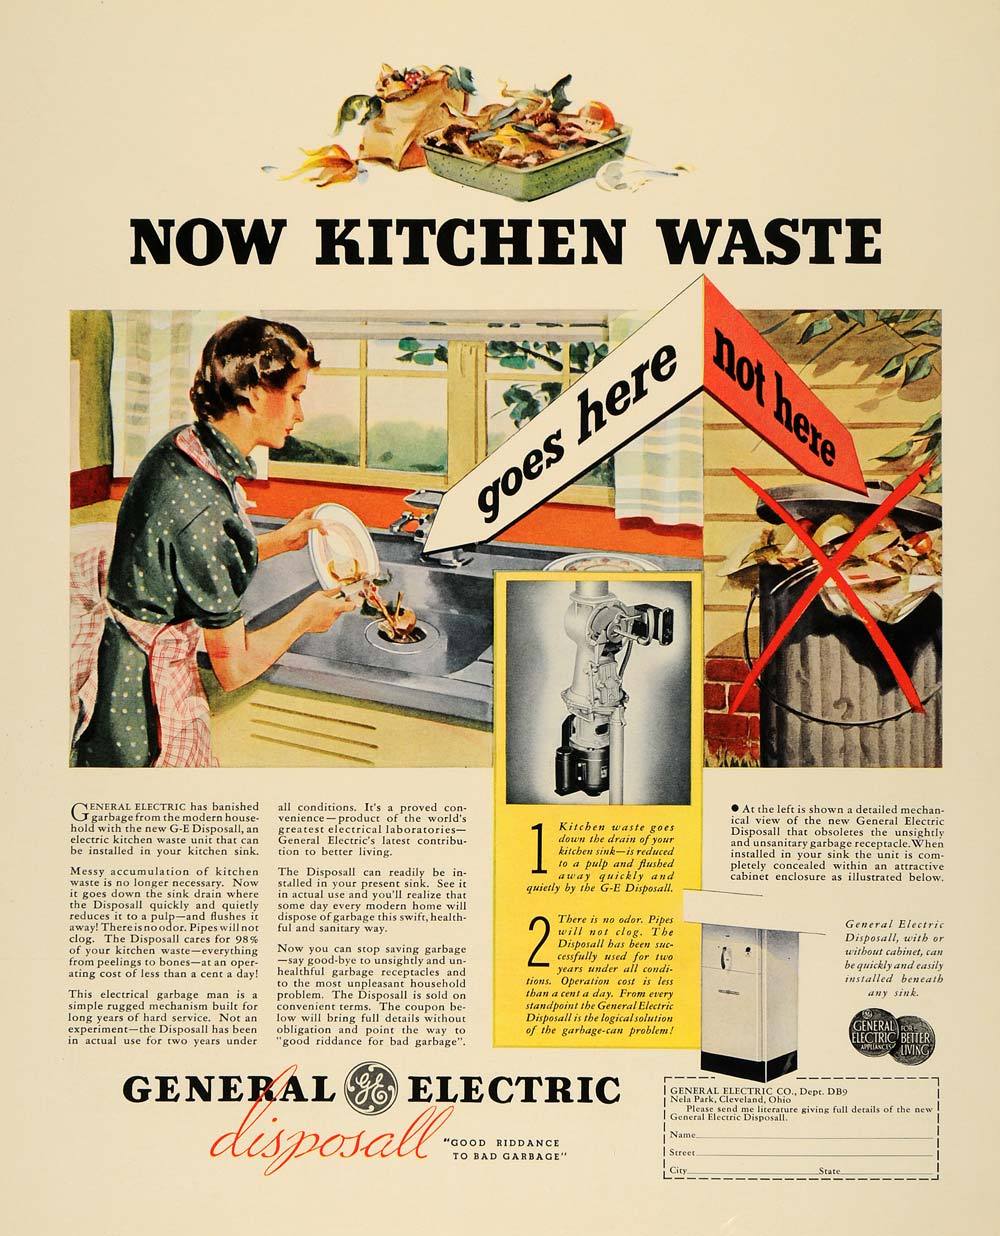
The image above is a print ad by General Electric for their garbage disposal, published in magazines in 1937. It was written in an instructional context to serve as both a marketing ad and a guide for consumers on how to use the machine because not many people knew how to operate it.
The selling of garbage disposal units was only limited to a few communities because they were deemed hazardous.
Nowadays, you would expect most households to have a garbage disposal unit. But in 2009, only 50% of households had one. The demand for these units is increasing daily because of their added benefit in waste management and innovations.
Types of garbage disposal units
Batch feed and continuous units are two of the common types of garbage disposal units being used today. The drain opening of the batch feed units should be covered to activate the machine, while continuous units have an on and off switch.
Air switch models utilize the air in the environment to switch on the unit. The common denominator among all these models is that they all use power connected to an electric outlet below the sink.
Warning
Do not operate while the unit is switched on. Check the power supplied to the switch with a voltage tester after unplugging the unit to ensure it is not harboring any electricity.
You can also use this method to diagnose any other problems with the unit related to electrical wiring, such as a faulty breaker or GFCI.
Common garbage disposal problems and how to fix them

Some problems with garbage disposal units are easy to determine, but there are times when it might be a little difficult to diagnose. We will list down below some common problems and a short guide to the first aid that you can do to repair them.
The machine won’t switch on.
When you switch on the machine, the sound of the running motor is your indication that the machine is operating. If you do not hear this after flipping the switch, an electrical problem might be behind the malfunction, and the electric current is not making its way to the unit itself.
Here are some ways that you can remedy that:
- Check if the unit is plugged in. While this may sound obvious, there are still people who forget to plug a device into the outlet. In fact, this is a very common incident.
- If it is plugged in, try pressing the reset button that is located underneath the unit. This is usually a red button used to control the built-in circuit breaker. If there is something wrong with the reset button, you will notice that it might be slightly popping outward. Just push the button back in, and this should reset the unit.
- If that does not work, proceed to check the main service panel and check if the circuit breaker has the problem. Reset the lever of the circuit breaker if that is the case.
- If neither of those two is the source of the problem, the fault might be in the wiring system that connects to the disposal, or the machine itself needs repair.
- Find the switch that switches the unit on and off. This button has two possible locations: under the sink or on the wall.
- Turn off the circuit breaker found at the main service panel.
- Dismantle the unit’s switch and carefully check the wirings. The connection may be loose and all you need to do is tighten it.
- If the wirings aren’t the problem, then the switch might be the faulty one. Purchase a replacement for the switch.
- When you have tried out every solution listed above, try turning it on again.
- If all else fails, the unit is defective, and you should consider replacing it altogether.
The unit makes a humming sound, but the grinders do not work.
When you flip the switch and the sound of the motor can be heard, but the grinders are not operating, the problem usually lies in the inner flywheel being jammed.
As a result, the machine’s reset button will pop more outwardly than normal, or the circuit breaker might trip. If this persists without repair, the motor could burn out unless it is reset or switched off by the circuit breaker.
The root cause of this problem is any foreign material that may have been lodged or stuck in the interior mechanism of the disposal unit between the shredder and impeller (read up on other sources to familiarize yourself with the parts of the interior of the unit).
We will say it again: Never, under any circumstances, reach into the garbage disposal hopper (grinding chamber).
- Cut off the electrical supply to the garbage disposal unit by shutting off the circuit breaker. Remember also to turn off the wall switch or the one underneath the unit.
- There should be an offset wrench that comes with the unit. Insert in the flywheel rotating hole below the machine. If you do not have this tool, you can buy it from local hardware stores or from the shop where you bought the unit. You can also use a large Allen/Hex wrench.
- Turn the wrench clockwise to loosen the impeller or the flywheel.
- You can also use the handle of a wooden spoon or ladle or any long wooden object to reach through the drain opening to the bottom of the disposal unit. You can use it as a level to pull free the flywheel.
- Look at the inside of the disposal and check for any possible objects that may have been lodged in between the mechanisms. Some common objects are meat bones or fragments of broken silverware or glassware. Do not pick it up with your bare hands. Use pliers or some form of tongs.
- When you’re sure that there are no more sources of blockage in the flywheel, switch on the power from the main service panel but do not turn on the unit just yet.
- Reset the unit using the button underneath.
- Run tap water into the internal of the disposal and rapidly switch it on and off for a short while to wash down any debris.
Leaks coming from the disposal

There are many places from which leakages in a garbage disposal unit could originate. The sink flange, the point between the unit and the sink meet, is a common site of leaks.
The hose that connects the dishwasher and the unit is also prone to leaks as well as the one that releases the waste from the disposal unit to the drainage system.
- Sink flange leak
The vibration that comes with the daily operations of the garbage disposal unit can loosen the connection between the unit and the sink drain. The sink flange mounting apparatus can leak as a result.
- Before doing anything, ensure that the power supply is cut off by switching off the circuit breaker.
- Rotate the mounting apparatus counterclockwise to loosen it and detach the unit from the flange.
- You should see three mounting bolts that are used to attach the flange to the sink.
- Check if the bolts are tight. If they are, then most likely the problem is in the plumber’s putty applied to it. Slightly loosen the bolts and elevate the sink flange just a little bit above the surface of the sink.
- Apply new beads of plumber’s putty between the flange and the sink, and put a generous amount, particularly around the flange.
- Tighten the bolts back in and push the flange and the sink surface together. Wipe away the excess putty that comes out.
- Reassemble the disposal unit and turn it back on.
- Check if there are still leaks when you let the water run.
- Leaks at the dishwasher connection
It is possible that there are also leaks on the rubber hose that drains the waste water from the dishwasher.- Make sure that the hose clamp on the dishwasher hose that connects to the water inlet of the unit is tightly secure.
- If there are still leaks, replace the hose.
- Discharge drain pipe leakage
There is a second plastic hose where wastewater passes through from the disposal unit down to the sink drain trap. Over time, this hose can also develop leaks.- Inspect the bolts that attach the discharge pipe to the machine and make sure that they are securely tightened.
- If this fails, unbolt the pipe and apply a new seal to the gasket between the discharge pipe and the unit.
- Reattach the bolts and make sure they are tight and secure.
Slow draining of the disposal

If the unit drains really slowly, it is a sign of clogging problems, just like any other regular household sink. To resolve sink problems, you will have to dismantle the drain trap along with the discharge pipe to manually get rid of whatever object is causing the clog.
- Unbolt the discharge pipe from the disposal unit.
- Detach the drain trap and the pipe of the discharge drain.
- Inspect for possible causes of clogging and clean it up.
- If you aren’t able to find any, the clog might be in the branch drain line that leads to the wall. You can use a sink auger to unclog it.
- Connect the reassembled drain trap to the discharge tube to the unit.
- Run tap water, switch on the machine, and check if there are any more leaks.
Smoke coming out of the unit
Smoke is pretty much the sum of all other problems that we mentioned above. The humming noise plus the jammed flywheel can lead to the entire unit completely ceasing functioning.
The motor being fried can create smoke which means that you have to replace the entire unit altogether. However, you might be lucky if only the circuit breaker is fried because this can still be fixed.
As a safety precaution, turn off the power supply to the unit before proceeding to do the following steps:
- Remove the cover of the lower portion of the garbage disposal.
- Look at the wires that are connected to the unit if they are burnt.
- If yes, simply cut off the burnt portion and remove the ruined insulation for the wiring.
- Reattach the remaining wirings.
- Get a new cover.
- Check if the problem is fixed by switching the unit back on.
If this does not solve anything or you do not have the skills to operate the wiring systems of the machine, do not hesitate to seek help from a technician or a plumber.
These skilled people will be able to give you a thorough and accurate assessment of your unit and advise on whether to repair just one part or replace the unit.
Unpleasant smell
Since that machine is where the garbage goes, it only makes sense that it will emit an unpleasant smell from time to time if not maintained well. One way to remedy this is by putting some cut-out lime or lemon wedges and some ice in the disposal and running it with cold water for 30 seconds.
Another DIY solution is the classic baking soda and vinegar combination.
If the odor is still noticeable after doing one or both of the tips mentioned above, then the source of the smell may be located further down the drain or within the unit.
There’s no other way to find out other than dismantling the unit and looking into the internal mechanisms and doing a thorough clean-up of the entire machine. You may need a plumber’s help for this. If that still does not solve the problem, it would be best to replace the machine.
Grinding noises
Hearing noises of metal parts clinking in the disposal unit is not a good sign. That could indicate foreign objects lodged between the parts or some form of obstruction in the motor.
Try and figure out what the cause is. If it’s beyond your capability to do so, seek the help of a professional to conduct a tune-up of your unit. If they see that the internal parts are already old and worn down, they will most likely advise you to replace the unit.
Safety reminders to always keep in mind
When cleaning the unit, do not use chemical-based drain cleaners. They are not effective and will only leave chemical traces on the sink and might even damage the unit.
What’s worse is that this is not covered by the service warranty offered by the manufacturer.
Here are some do’s and don’ts of cleaning and unclogging your garbage disposal.
- Don’t:
- Dispose of ground potato peels. These form a starch paste with a consistency that is almost the same as mashed potato and can be a cause of drain clogging.
- Throw in coffee grounds or eggshells. They are also common objects that cause obstruction and clogging in the pipes and internal parts of the machine.
- Do:
- Avoid the accumulation of bad odor and foul smells from your unit through regular maintenance of your garbage disposal and placing lemon peels or wedges and ice.
- Treat it with a solution of baking soda and vinegar at least once a month to get rid of the lingering smell in the disposal hopper. Make sure that the machine is turned off before doing so. Once the foaming is done, rinse it by running it with tap water.
How does a garbage disposal work?
Refer to this diagram. You will notice a housing chamber for the shredder where the food is broken down into smaller pieces.
The impeller arm and plate push the processed waste down the drain.

There is an inlet that is intended to be connected to the dishwasher via the drain hose. This is beneficial in such a way that the drain water from the dishwasher can be used to run through the garbage disposal while breaking down the large particles at the same time before sending them down the drain.
Make sure the unit is switched off by checking the electrical circuit before conducting any repairs or check-ups.
How much does it cost to repair a garbage disposal unit?
Some minor repair jobs can be easily done at home with the right tools without the need for professional assistance. But for the more severe problems that cannot be resolved manually, you will need to replace the entire unit altogether and install a new one.
This will cost around 50 to 350 USD depending on the model.
Do some research on the different types of garbage disposal units available on the market before making the purchase to ensure that your choice is compatible with the type of sink that you have in your home.
The price of hiring a technician or professional to install the unit varies and usually depends on how long the job would take. Initial installation can take around 2-3 hours.
It’s better for you to request a bid so you can negotiate the cost.
Cleaning the garbage disposal
You need to conduct regular cleaning and maintenance of your unit to ensure that it functions smoothly and reduces the risk of incurring damages. When cleaning the blades, always be careful and make sure that the unit is switched off and any connection to an electric source is cut off.
- Break some ice cubes in the grinder to clean the blades. Make sure that the drain stopper is kept securely in place so the chunks of broken ice won’t go anywhere and the grinding chamber is secure.
- Take some citrus fruit peels to sanitize and give the machine a hint of a pleasant smell. This also helps to naturally cleanse the surfaces of the machine and disinfect it to get rid of odor-causing bacteria.
- A grease remover formula specially concocted for garbage disposal units can remove excess grease from the blades.
- Do a regular unclogging of the drain line at least once a year or every two years.
Things to never throw into the garbage disposal
Clogging is caused by unwanted objects lodged in places where they shouldn’t be. It can be a real hassle to remedy, and it could even lead to damages to the unit if left unresolved.
While garbage disposal is a site to dispose of leftover food particles, this is not a trash bin. You should always scrape off excess food particles from the plate before washing them so no large particles can make their way into the machine.
Below are the things you should never put down into the garbage disposal.
- Fibrous and heavy vegetable materials like corn husks, pumpkin innards, and celery; fruit and vegetable peels from potatoes, bananas, and onions.
- Eggshells, coffee grounds
- Cooked rice and pasta, which thicken as they cool
- Meat chunks and bones
- Meat fat, grease, oil. Contrary to popular belief, these do not help because the blades of the disposal do not need greasing.
- Harsh drain cleaning chemicals are not disposal-friendly.
Avoid disposing of vegetable peels down into the disposal. A better idea would be to gather them all together and use them as fertilizer for the soil or as a compost pile.
When grinding, do not use hot water. This will react with the fats or grease that are inside the disposal and could clog the drain line.
Run cold water before grinding and do the same after for 15 seconds. This will flush down food bits and won’t react with the fats.
When to replace your garbage disposal unit
Some damages are beyond repair. A worn-out part or even a slight crack means that you should replace the unit altogether. Some problems that would require you to get a new one are:
- Leaks that are difficult to repair
- Frequent clogging
- Frequent jamming in the internal parts
- Too much noise when operating
- Slow operation
There are units with many features, and reading up on buying guides can help you choose what works for you and your household.
When it comes to repairs and installation, you can seek the services of skilled professionals. People with sufficient knowledge can accurately diagnose what’s wrong with the machine and provide you with viable solutions.