Got your hands on a new 70mm telescope? You’re in for a treat. This guide will walk you through the cosmic wonders waiting for you in the night sky. We’ll cover everything from what you can realistically expect to see to tips on getting the most out of your stargazing sessions.

Understanding 70mm Telescopes

Let’s break down what “70mm” actually means and why it matters.

The “70mm” refers to the diameter of your telescope’s main lens or mirror. It’s the aperture – essentially the “eye” of your telescope.

Larger aperture = more light gathered = more to see.

70mm telescopes come in two main flavors:

Refractors: These use lenses to gather and focus light.

  • Pros: Easy to maintain, great for planets and the Moon
  • Cons: Can be pricier for larger apertures

Reflectors: These use mirrors instead of lenses.

  • Pros: Often more affordable for larger apertures
  • Cons: Might need more frequent alignment

Your 70mm scope likely came with:

  • One or two eyepieces
  • A finderscope (helps you locate objects)
  • A mount to keep it steady

While it’s not the biggest telescope out there, a 70mm can show you some truly amazing sights. Let’s dive into what you can actually see with this cosmic peephole.

The Moon: Your First Target

The Moon is often the first stop for new telescope owners, and for good reason. Even with a 70mm telescope, lunar details pop in a way that’ll make your jaw drop.

What you’ll see:

  • Craters galore: From the massive Tycho with its bright rays to countless smaller pockmarks
  • Mountain ranges: Look near the terminator (the line between light and dark) to see them cast long shadows
  • Maria: These dark, smooth areas were once thought to be lunar seas

Pro tip: Lunar phases affect what you see. Full moon? You’ll see the entire disk, but contrast can be low. For the best views, aim for the first quarter or just after. The shadows during these phases make the Moon’s surface features really stand out.

Want to level up your lunar observations? Try this:

  1. Start with a low-power eyepiece to get the full view
  2. Gradually increase magnification to zoom in on specific features
  3. Sketch what you see – it’s a great way to improve your observing skills

Planets: Jewels of the Night Sky

Your 70mm telescope brings our solar system neighbors into view. Here’s what to expect:

Jupiter: The king of planets doesn’t disappoint.

  • You’ll easily spot its bright disk
  • Look for its four largest moons – Io, Europa, Ganymede, and Callisto
  • On good nights, you might glimpse Jupiter’s cloud bands
  • Try observing over several nights to watch the moons’ positions change

Saturn: This planet is the showstopper for many beginners.

  • The rings are visible, though they might look more like a line than distinct rings
  • With patience and good conditions, you might spot Titan, Saturn’s largest moon
  • The view of Saturn often elicits a “wow” – even from experienced stargazers

Mars: The Red Planet can be tricky, but rewarding.

  • It appears as a small, reddish disk
  • During close approaches to Earth (every 2 years), you might make out some darker surface features
  • Patience is key – Mars often rewards repeated observations

Venus: Our sister planet puts on a show of its own.

  • You’ll see Venus go through phases like our Moon
  • While surface details remain hidden, its changing shape throughout its orbit is fascinating to track

Uranus and Neptune: Yes, you can spot them!

  • They’ll appear as tiny, pale disks
  • Identifying them can be a fun challenge – use star charts or astronomy apps to help

Planet-watching tips:

  • Planets move! Use astronomy apps or websites to know when and where to look
  • Start with low magnification to find the planet, then bump up the power
  • Be patient – moments of steady air can reveal surprising detail

Check out our best telescopes to watch planets and galaxies.

Deep Sky Delights: Beyond Our Solar System

Your 70mm telescope can reveal some of the universe’s most beautiful objects. Here’s what to look for:

Star Clusters: Nature’s cosmic jewelry boxes

  • Open clusters like the Pleiades (M45) sparkle like diamonds scattered on black velvet
  • The Double Cluster in Perseus is a stunning pair visible even in light-polluted skies
  • Globular clusters like M13 in Hercules appear as fuzzy balls of light – each containing hundreds of thousands of stars!

Nebulae: Stellar nurseries and graveyards

  • The Great Orion Nebula (M42) shows up as a misty patch of light
  • On dark nights, you might glimpse its overall shape and structure
  • The Ring Nebula (M57) in Lyra appears as a tiny smoke ring – it’s the remnant of a dying star

Galaxies: Island universes

  • The Andromeda Galaxy (M31) appears as an oval smudge of light
  • With dark skies, you might make out its shape and even hint at its dark lanes
  • The Pinwheel Galaxy (M101) and Whirlpool Galaxy (M51) are challenging but rewarding targets

Deep sky observing tips:

  • Dark skies are crucial – get away from city lights if you can
  • Let your eyes fully adapt to the darkness (it can take 30 minutes or more)
  • Use averted vision – looking slightly to the side of faint objects often makes them easier to see
  • Take your time – the longer you look, the more details you’ll notice

Factors Affecting Your View

Several things influence what you’ll see through your telescope:

Magnification: More isn’t always better

  • Your telescope’s focal length combined with your eyepiece determines magnification
  • Too much magnification can make images dim and blurry
  • Start low, then increase as conditions allow

Light Pollution: The astronomer’s nemesis

  • Dark skies make a huge difference in what you can see
  • If you live in a city, consider traveling to darker locations for the best views
  • Even small improvements in sky darkness can make a big difference

Atmospheric Conditions: Clear and steady wins the race

  • Look for nights with clear, steady air for the best viewing
  • Avoid nights with high humidity or turbulent air
  • Sometimes conditions vary hour by hour – patience can pay off

Your Eyes: Your most important observing tool

  • Give your eyes time to adjust to the darkness
  • Avoid looking at bright lights or phone screens
  • Consider using a red flashlight to preserve your night vision

Getting the Most Out of Your 70mm Telescope

Follow these tips to maximize your stargazing experience:

  1. Align your finderscope: This small scope on the side of your main telescope helps you locate objects. Take the time to align it properly – it’ll make finding targets much easier.
  2. Start with low magnification: Use your lowest power eyepiece to find objects, then switch to higher magnification if needed and if conditions allow.
  3. Let your telescope acclimate: If you’re bringing your telescope from a warm house into cold air, give it time to reach the outside temperature. This prevents condensation and air currents inside the tube that can blur your view.
  4. Use astronomy apps: Apps like Stellarium or Sky Map can help you identify what’s visible in your night sky and where to look for specific objects.
  5. Join a local astronomy club: Experienced members can offer tips, let you look through a variety of telescopes, and introduce you to new observing targets.
  6. Keep an observing log: Write down what you see each night. It’s a great way to track your progress and remember your best observations.
  7. Try astrophotography: Even with a smartphone, you can capture impressive images of the Moon and bright planets through your telescope.
  8. Experiment with filters: Simple color filters can enhance planetary details, while a moon filter can reduce glare for more comfortable lunar observing.
  9. Master star-hopping: Learn to use bright stars as guideposts to find fainter objects. It’s a valuable skill that’ll serve you well as you explore the night sky.
  10. Be patient and persistent: Some nights will be better than others. Keep at it, and you’ll be rewarded with incredible views.

Limitations and Expectations

While 70mm telescopes offer fantastic views, it’s important to set realistic expectations:

  • Planets will be small. You’ll see them, but don’t expect Hubble-like images.
  • Deep sky objects like galaxies and nebulae will mostly appear as faint, fuzzy patches.
  • Very faint objects might be challenging or impossible to see, especially under light-polluted skies.
  • The views through your eyepiece won’t match colorful photos you see online – those are often taken with long exposures and processed to bring out detail.

That said, your 70mm scope strikes a great balance between capability, portability, and cost. It’s an excellent starting point for exploring the night sky.

Conclusion: Your Gateway to the Cosmos

Your 70mm telescope is a capable instrument that can show you wonders of the night sky. From the rugged face of the Moon to the rings of Saturn and the misty glow of distant nebulae, there’s no shortage of celestial sights to explore.

Astronomy is as much about the journey as the destination. Each night brings new opportunities to learn and discover. Be patient with yourself and your equipment, and don’t get discouraged if you don’t see everything right away.

Set up your telescope, point it skyward, and prepare to be amazed. The universe is out there, waiting for you to explore it, one celestial object at a time. Clear skies and happy stargazing!

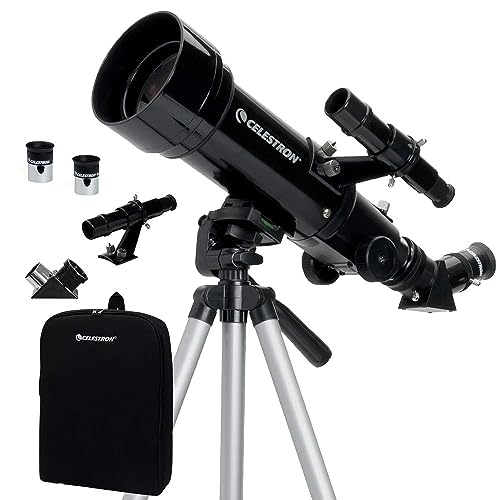
Top Pick: The Best 70mm Telescope for Beginners

Last update on 2025-01-25 / Affiliate links / Images from Amazon Product Advertising API

This post contains affiliate links, which means I may receive a small commission, at no extra cost to you, if you make a purchase using these links.